Every so often I get into the mood of a speech. This is one of those times. So if my speeches bore you, stop reading now! and just head over to the recipe!
The past three weeks have been crazy – the details of which I will spill out in my coming posts. But it also meant that my mum was at home correcting some of my recipes in draft, urging me to try them out once again under her supervision. Her presence meant that I was also going to try out some never tried before recipes and enjoy them too. While I happily went about doing this – grinding, grating, stirring, conversations flowed freely and so did the tips and kitchen tricks. Goodness! What would life be without mothers? A mother’s love, compassion & kindness has been long talked about in prose & poetry but what about a mother’s touch? The skillfulness with which she can transform any house into a home is simply marvellous. My mum too then, in her own special way taught me a million things in the brief one month that she stayed with me.
Cooking is something you can learn from someone or just by yourself – with or without making mistakes. There are also books and the internet that can teach you a thing or two. But very few people can teach you how to salvage a dish from disaster. How to change the flavour with just a sprinkling of an ingredient. Sometimes just a few tricks can actually transform a dish from ‘yuck’ to ‘wow’. Isn’t it? Well, my mum just shared such tricks and I think it has changed the way I cook.
This biryani has been prepared in my home for as long as I remember. My mum says that when I was born she had a balnti posteli (live in nanny/care giver for the new mother & baby) who just chatted about this simple and tasty biryani that could be made in a jiffy in a pressure cooker – she appeared excited & amazed apparently. This was because 35 years ago the pressure cooker was pretty much a new and well sought after kitchen gadget and housewives were just beginning to discover & master it. My mother quickly made a mental note of the ingredients that went into that recipe and soon was on her way to creating pots and pots of this lovely biryani – so simple in its flavours and so wonderful because it was home made.
Mummy must have made this biryani so many times that she actually knew it by heart and never went wrong with the proportions no matter how many people arrived for a meal. She made it when there was a birthday party or when someone dropped in for the first time or there was a newlywed couple invited for a dinner party. Mum said this was the easiest dish she could make and it made life in the kitchen a lot more easy.
Since she knew that we loved it so much she prepared copious amounts of it – so that leftovers could be eaten for breakfast, lunch & tea the next day! Yes, such is my love for biryanis!
Mum is not net savvy and hence she has never had the chance to read any of my blog posts, however, this time I was actually happy to show her my blog and she spent a good number of hours reading through some posts and I can say that I could see that she was proud of her lil girl! More so when Babble.com announced their list of Top 100 Mom Food Bloggers for 2013 – my little blog made it to the Top 10! Yes! Ruchik Randhap has been ranked at #9 Best Overall & #10 Best Recipes. I am truly humbled by this honour and want to thank all my readers for having made this possible! Most importantly, if today my readers appreciate my recipes for my attention to fine details, it all comes from my mum. She is a pro at explaining a recipe (or anything!) from scratch. She gets down to the real details even when she’s on a long distance call – something that used to greatly annoy me in the past, but as the years rolled by I realised how precious those tips, trips and narrations were – especially because I am now a mother myself – a forgetful one at that, so the extra reminders are helpful. So this is a thank you post in its true sense – a big thank you to my mother for teaching me everything that makes me a better wife and mother. I love you mum!
About the dish
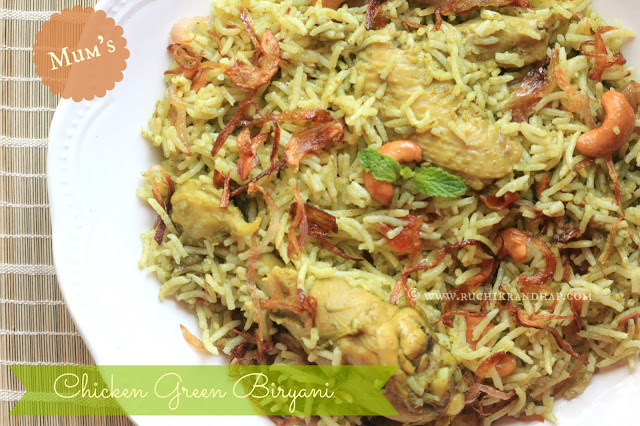
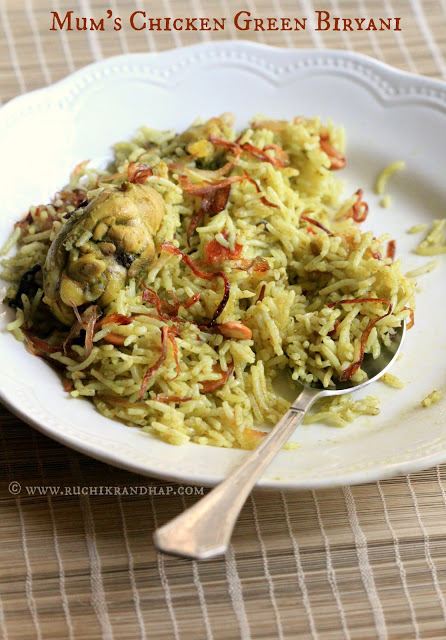
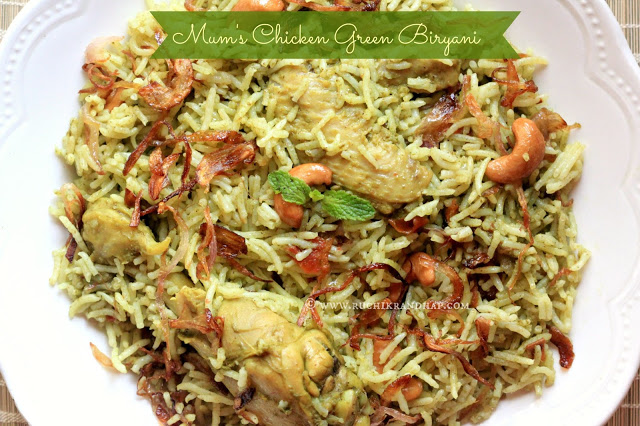
Simple & succulent pieces of chicken in an aromatic green gravy – flavoured by coriander & mint teamed with aromatic basmati rice to make a one pot meal.
Important! This is a no frills recipe for a deliciously simple biryani. It is truly a basic recipe that requires simple and easily available and regularly stocked ingredients. However since I believe that God is in the details, I have explained the method elaborately so that it helps the beginner. This may make the recipe look too complex, but trust me, it really is very simple.
Mum's Chicken Green Biryani (Pressure Cooker Method)
Simple & succulent pieces of chicken in an aromatic green gravy - flavoured by coriander & mint teamed with aromatic basmati rice to make a one pot meal.
Print
Rate
Ingredients
- 1 kg chicken or mutton/beef on the bone * see note#1
- 2 tablespoons ghee
- salt to taste
Masala to be ground:
- 50 grams 1 firmly packed cup coriander - you may add 2 sprigs of mint leaves to this
- 10 garlic flakes
- 1-1/2 " piece of ginger
- 1 tsp poppy seeds (khus khus *see note#2)
- 1/2 tsp turmeric powder
- 2 inch stick of cassia bark or cinnamon
- 4 cloves
- 4 medium sized green chillies (of medium spiciness - adjust to taste)
- Other items to be added to the gravy
- 125 grams 2 medium sized tomatoes
- 2 tablespoons sour curds
For the rice:
- 3 cups long grain basmati rice * see note# 3
- 4 cups of water * see note#3
- 4 cloves
- 1 bay leaf
- 1 star anise, optional
- 1 " stick cassia bark or cinnamon
- 3 cardamoms bruised
- 3 tablespoons ghee
- 1-1/2 tbsp lime juice, approx 3/4th of a large lime
- Salt to taste
For garnishing:
- 250 grams 3 medium sized onions finely sliced
- 12-13 whole or 24-25 halves cashew nuts
- 3 tablespoons ghee
- few mint leaves, optional
Instructions
Prepping up
- Cut the chicken in slightly bigger pieces than your usual curry cuts. This is how the pieces should be for biryanis. Wash and allow to drain on a colander.
- Wash the rice in two changes of water & soak it for 20 minutes.
- Heat ghee for the garnishing in a large heavy bottomed pan or kadhai and fry the onions till golden brown. When they are beginning to turn golden brown, reduce the heat as they tend to burn within seconds. Drain off excess ghee by gathering them against the sides of the pan. Remove and spread out on a large plate - this will help the onions to cool off and turn crispy. In the same ghee fry the cashew nuts till pale golden, remove and keep aside.
- In a small non stick pan fry the tomatoes without any oil until they are mashed. Keep aside
Preparing the masala & the curry
- Wash the coriander leaves and drain off excess water. Grind them to a fine paste along with the rest of the ingredients mentioned under 'Masala to be ground'. Retain the masala water from the mixer grinder.
- In the same kadhai that was used to fry the onions and to the same ghee (add extra ghee if desired) add the ground masala and fry on a medium flame for 3-4 minutes or until the ghee begins to leave the masala. Add the curds and fry for another minute and then add the fried tomatoes and continue to fry the masala for another 2-3 minutes. Add the chicken pieces, salt to taste, about 1/2 cup water and cook until the chicken is tender (fully cooked). When the curry has cooled a bit, remove the gravy and measure it using the same cup that was used to measure the rice. You should get approx 2 cups of this gravy. Keep this aside and leave the cooked chicken in its pan.
Preparing the rice
- To make the rice, you need a large pressure cooker with a minimum capacity of of 7 or 7.5 litres and above (assuming you are making the same quantity of rice as mentioned in this recipe). (* see note #5)
- Heat the 3 tablespoons of ghee on a medium-low flame and add the whole spices - cassia bark/cinnamon, cardamoms, cloves, bay leaf & star anise. As the spices are frying be careful as they can pop out of the pan, so keep your face at a safe distance.
- Drain all the water from the soaked rice and add the rice and gently fry for about 3-4 minutes or till the rice begins to feel heavy. If you fry beyond this point the rice will begin to break.
- While the rice is frying, in another pan bring the 4 cups of water to a boil - this water along with the 2 cups of gravy (a total of 6 cups of liquid) will be used to cook the rice. (see note#4)
- Add the boiling water and the reserved 2 cups of gravy (without chicken pieces!) to the rice. Do a quick taste check - add the salt & lime juice and adjust the flavour - it should have a good balance of spicy-tangy-salty (remember that the curry already had salt added to it). When the mixture begins to boil & bubbles start to appear quickly close the lid of the pressure cooker, place the weight (whistle), reduce the flame to a complete simmer (the flame should just touch the base of the cooker) and let it cook for exactly 5 minutes (keep a timer!)
- When 5 minutes are up, turn off the flame and allow the pressure cooker to cool down to room temperature. Wait till you able to remove the weight (whistle) easily. Once this happens, open, stir gently with a fork - this is done to give the rice a proper mix as some ingredients such as the tomatoes or whole spices tend to float to the surface of the rice. Cover the lid lightly & keep aside.
Assembling the biryani
- Take a large, deep pan or serving dish and layer it with one third of the rice. Sprinkle a few fried onions & cashew nuts. Top up with half the chicken pieces. Place another layer of rice and the fried onions, cashew nuts and the remaining chicken. The final layer will have only the rice, rest of the fried onions & cashew nuts. Garnish with mint leaves (optional)
- Serve hot with any raitha of your choice
Notes
1. If you wish to use mutton or beef you will need to pre-cook the meat with salt, separately in a pressure cooker and then proceed to step#2 under 'Preparing the masala & the curry'. Cooking time of red meat varies upon the quality & quantity used. Please use your judgement here
2. You may skip the poppy seeds if it is unavailable. Use it if possible as it definitely adds to the taste & texture.
3. Ideally for 1 kilo chicken an equal amount of rice is used. But for small families of 2-3 people 1 kilo of rice results in too much biryani, so you may use 1/2 kilo rice instead which is 2-3/4th cups (US standard measure - 1cup = 237ml or 8oz). To avoid confusion I have simply used 3 cups of rice.
4. The reason we are using a mixture of water & gravy is to make the rice flavourful and also the biryani won't spoil fast (unlike the rice that is cooked separately & added).
5. If you do not have/wish to make this biryani in a pressure cooker you may simply use a regular large sized pan (heavy bottomed Indolium, not steel). Just cover it with a well fitting lid or aluminium foil and a weight (mortar & pestle will do) and cook for approx 14 minutes on simmer (cook time varies depending on the quality of rice used). Turn off the flame and let it sit for 5 minutes before you open & stir the rice.
6. While the chicken is being cooked, you may get anywhere between 2-3 cups of gravy. If you have not drained the chicken well after it was cut and washed, you may get extra stock (a slightly watery gravy). Either ways, you can use 3 cups of gravy for 3 cups of rice and then add water to arrive at the full quantity of liquid used to cook the rice. Using more gravy makes the rice more flavourful.
Disclaimer
The nutritional values are only indicative.
Tried this recipe?Please leave a comment & rate the recipe below or share a photo on Instagram and tag me @ruchikrandhap


My wife loves reading your blog and trying new recipes while i look forward to the eating. You rank in the top 10 list with retired chefs and professional trained cooks, you need to put that link at the top of your post where nobody should miss it. At the very least i think it qualifies its own separate blog post.
This is how my mum makes it too. I am definitely giving this recipe a shot and let you know.
Simply awesome looking Chicken green Biryani. Wonderfully prepared.
Deepa
Such a tempting biryani looks so stunning, Mom's recipes never fail in taste and to impress right?
Oh i didnt know ur name is Shireen thanks for the beautiful flavorful biryani Shireen n congrats for the top ratings!
oh wow shireen… this looks amazing, and that too in pressure cooker… bookmarked!!!!
hi shireen
that looks yummy& appetizing..i was looking for the mum style green chicken/mutton biriyanicooked in manglorean households for a long time. my mum used to make it while we were little kids,now due to the advent of new recipes she completely forgot the recipe. thnks to u . now i will definetly give a shot at it and let u know,
savi
@ Louis D'Costa: Thank you so much for your kind appreciation, i am so happy to know that you & your wife enjoy my recipes! Regarding the ranking, I do have a badge displayed on the right side panel 🙂 Maybe if I make it to the top next year too I will write a post on it 😀 Thanks again for your comment!
@ SS, Deepa, Priya, Rafeeda: Thanks a ton!!
@ Thanks Princy Vinoth, yes, my name is Shireen – a lot of people thought it was 'Ruchik' haha!
@Savi: Thanks darling, do try it & let me know how you liked it!
Drooling just reading the recipe.
This is on the menu for this wkend…
I love the new set of pics on the home page- wild summer fruits of Mlore, brings back so many fond childhood memories…
Wow made in a pressure cooker..looks perfect!
I tried this recipe today and it turned out fab!!Thank you for sharing your mums recipe!!
Vanessa
@ Unknown, Gauri – thanks a ton for the compliments! I hope you try it and like it too!
@ Vanessa: Thanks a ton for your feedback! So good to know that you enjoyed the biryani 🙂
Shireen, I have made the same receipe N number of times and all love it…..
Thanks so much Sheryl!! 🙂 Glad to know that you have tried this recipe so many times & love it!
Hi Shireen, I made it today its just wow it turn fab. My hubby loved it very much. Thanks once again for sharing such a wonderdul recipe. God bless u.
I too enjoy your recipes Shireen! Is this the Mangalorean way of making biryani? Can't wait to try.
Would you have a recipe to make the Roce mutton curry?
thanks and cheers!
@ Nina: Thanks so much for your comment! Yes, this is pretty much how biryanis are cooked in Mangalore! I have the chicken roce curry on the blog. Please search using the 'search bar' above or also on the A-Z recipes section. You can replace chicken with mutton
Wow. Was going through the Biryani section. Just loved your writeup. Mum”s are special & they will cook with andaza.. Lots of love & Hugs to Mum. She must be so proud of you., Thks for the delicious recipe. Stay blessed dear 🙂
Thanks so much for your lovely comment Vanita! You certainly made my day! Yes, my mum is proud of me today!
Wow. Loved the writeup. Mums”s are the best. lots of Love & hugs. Thks for sharing the recipe. Its so delicious. Stay blessed my dear 🙂
Thanks so much Vanita!! 🙂 Glad you enjoyed reading this post!
Yummy yummy! All loved at home here
Thanks for the recipe
Thanks a lot for your feedback Asha! Happy to know that everyone liked it!
Congratulations Shireen. Lovely recipe hope to try it some day.
Thank you so much Shamine! Hope you like it
I tried this recipe yesterday. It turned out really well. I’ll definitely make it again.
Thank you so much for the feedback Shona!! Glad you liked it!
Made this in the past and then forgot about it. Made this after a long time and I think this is by far the best Biryani I’ve ever made. I made it with mutton and it was just perfect. thanks Shireen for posting this and special thanks to your mum for this awesome creation.
Thank you so much for the great feedback Sahana! My mom was so happy to know that you enjoyed the biryani so much. She is on top of the world <3